As we discussed the past week, there are so much different between the modern photography skill and the early days skill, and photo enhancement is a strong example to prove this point, so in thisa week, I am gonna try to be a photography to edit a photo in order to show you how people ususally edit their photo.
For photo enhancement, you do not really need a lot of professional softwares to perform it, but just a simple tool - Adobe Photoshop. Now, I am going to use photoshop to show you how to edit a photo. I believe that there are so many people got upset about their pimples, and run away from the camera when peolple are taking picture. However, if you use the skill I recommending below, then you will not get upset about the pimples anymore. The first original photo below is just random searched by me from google image, you could see the girl's face is full of pimples, I believe that it will not be hided even if put on make up, but photoshop could solve the probelm. First step, zoom into the area needing to be edited. Second step, click on the healing brush tool, and resize the tool to a size large enough to cover the largest range. Third step, find an area that is clear with a similar color as the area you are trying yo edit, press the "ALT" button(on the keyboard) and click on that clear area to pick up the color range. Fourth step, randomly click on each pimple to cover it with a similar color and texture of the clear area. Finally, do the same steps agian to different area of the pimples. Now you could see the pimples on the face are all gone, and I suggest you to change the lightness higher in order to make the skin looks more white. Then you could see a totally different face with perfect skin just like the second photo below.

Photo resource from Google Image
After

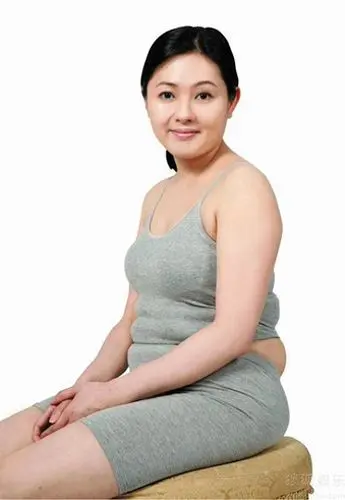
Again, I am going to show you another magic of photoshop. The first original photo below is randomly searched from google image. In the image, you could see a lady is really fat. Now if you follow my steps to edit the photo, then you could use your magic to make her become a skinny lady. First step, click on Filter menu and select Liquify. Second step, in the liquify effect window, click on the freeze tool to apply the freezing function. The freezing function is used for freezing the area in the photo that you do not want to edit. Third step, you start to highlight the parts of the body which u need to make thin. Fourth step, go to the tool bar again, to seclect the wrap tool, and change it to the ideal size you want. Finally, you could use the wrapping brush to touch the edges of the body area with to make them look thin. For this skinny skill, you need to touch the edges of the body carefully, or you would make the body looks abnormal. And the second photo below is the one after I edit, you could see how is the photoshop magic!
Before

Photo resource from Google Image
After

For all of you, if you try more, then you will discover more photo skills for photo editing. In conclusion, photo enhancement is a magic!
Reference List:
Google Images
No comments:
Post a Comment